
2 posts tagged with "Authentication"

View All Tags

· 8 min read
Andrew Block

Backstage is a tool for building Internal Developer Platforms and includes the flexibility to be deployed within a variety of operating environments, including containers. In prior articles, it was introduced how the deployment of Backstage within Kubernetes environments can be streamlined through the use of the Backstage Helm chart as well as integrating the platform into identity stores, such as Keycloak. OpenShift is a common deployment target for running Backstage as it provides enterprise grade container orchestration and one of its capabilities is the ability to integrate with a variety of Identity Providers. Since many users of Backstage also use OpenShift to build and deploy containerized workloads, there is a desire to more closely tie into existing workflows and access models. This article introduces how Backstage can be integrated with OpenShift’s existing authentication capabilities to provide a seamless path for users to access the Backstage portal.

In addition to the base platform, OpenShift also includes a number of additional features that enhance not only how administrators, but developers work with the platform and include those that support GitOps and multicluster workflows just to name a few. Many of these same components also provide their own user interface which expose their capabilities. To enable ease of use, access is granted using the same authentication mechanisms as the OpenShift cluster itself using a workflow similar to the native OpenShift console. The ability to authenticate to applications using the same set of credentials as OpenShift itself is facilitated through the OpenShift oauth-proxy -- a separate container running within the same pod, using the sidecar pattern, which intercepts requests and interacts with the OpenShift platform to restrict access to facilitate the authentication process.

Enabling OpenShift Authentication

As described in the article, Enabling Keycloak Authentication in Backstage, support is available within Backstage to utilize an OAuth proxy container to restrict access to the platform. The same approach can be used for OpenShift as well. The key difference is that instead of using a generic oauth2-proxy container, the OpenShift oauth-proxy container is used as it has features designed specifically for OpenShift. Thanks to the versatility of the Backstage Helm chart, the other changes that need to be made to enable this feature is to the content of the Values.

Generally, the use of the OpenShift OAuth proxy requires the following to be configured:

  1. An OAuth client to communicate with OpenShift
  2. TLS certificates to expose the OAuth container
  3. Configure the Route that is exposed by the OpenShift ingress router

Let’s describe how to enable each of these configurations.

OAuth Client Configuration

OpenShift provides two methods for registering a new OAuth client:

  1. Creating a OAuthClient Custom Resource
  2. Using a Service Account as an OAuth client

The former is commonly used by cluster services, such as the OpenShift web console, but has the disadvantage of a cluster scoped resource, thus requiring elevated access. The latter is more applicable in this use case as a standard OpenShift Service Account can perform the function of acting as an OAuth client. All that is required to enable such functionality is adding an annotation with the key serviceaccounts.openshift.io/oauth-redirecturi.<name> to the Service Account with the location of the redirect URI. For the case of the OpenShift OAuth proxy, it would be at the /oauth/callback context path.

This capability can be enabled by setting the following Helm values.

serviceAccount:
create: true
annotations:
serviceaccounts.openshift.io/oauth-redirecturi.backstage: 'https://{{ .Values.ingress.host }}/oauth/callback'

TLS Certificate Management

There are multiple methods for which TLS certificates can be configured within OpenShift. They could be provided by the end user or by way of an operator, such as cert-manager, which can integrate with an external certificate management tool or generate certificates of its own. OpenShift also includes support for automatically generating and injecting certificates into applications through the Service Serving Certificate feature. The service-ca monitors annotations placed upon OpenShift Service resources. When a Service with the annotation service.beta.openshift.io/serving-cert-secret-name=&lt;name> is created, the controller generates a certificate and its associated private key within a Secret.

To have OpenShift generate certificate within a Secret called backstage-tls which can be configured within the OAuth proxy, the following Helm values can be specified:

service:
annotations:
service.alpha.openshift.io/serving-cert-secret-name: backstage-tls

Ingress Configuration

The ability to expose applications running within OpenShift externally has been one of the most compelling features included within OpenShift ever since the early days of version 3. Routes, the predecessor to the native Kubernetes Ingress resource, has enabled such functionality and it continues to this day. However, more and more applications are favoring the native Kubernetes Ingress option over the OpenShift specific Route.

Fortunately, OpenShift can automatically "upconvert" Kubernetes native Ingress resources to OpenShift Routes. In addition, the upconversion can be customized. In particular, the TLS termination type to configure end-to-end secure transport. As described in the prior section, the OAuth proxy is secured using a certificate provided by the Service Serving Certificate feature. While this certificate is generated by a Certificate Authority that is trusted within OpenShift, end users would not be able to trust such certificates.

To work around this challenge, the generated Route that is created from an Ingress resource can be configured with a TLS termination type of reencrypt. TLS communication is terminated at the Ingress router and reencrypted for transport to the underlying pod. Since OpenShift assets trust the certificate that is used by the service-ca controller, trust is established for the final leg of communication enabling a fully trusted path from client to server.

Similar to the enablement of the Service Account as a OAuth Client and the Service Service Certificate feature, an annotation can be placed on an Ingress resource with the key route.openshift.io/termination with the value of reencrypt to set up the Route to expose the Backstage instance.

The following Helm values can be specified to configure the Ingress resource:

ingress:
enabled: true
host: backstage.apps.example.com
annotations:
route.openshift.io/termination: 'reencrypt'

Deploying the Backstage Helm Chart

With the primary changes called out, the final step is to declare the full set of customized Helm values and to deploy the instance of Backstage using the Backstage Helm chart.

Create a file called values-backstage-openshift-auth.yaml with the following content:

values-backstage-openshift-auth.yaml
backstage:
image:
registry: quay.io
repository: ablock/backstage-oauth
tag: latest
extraEnvVars:
- name: 'APP_CONFIG_app_baseUrl'
value: 'https://{{ .Values.ingress.host }}'
- name: 'APP_CONFIG_backend_baseUrl'
value: 'https://{{ .Values.ingress.host }}'
- name: 'APP_CONFIG_backend_cors_origin'
value: 'https://{{ .Values.ingress.host }}'
installDir: /opt/app-root/src

extraContainers:
- name: oauth-proxy
args:
- -provider=openshift
- -https-address=:8888
- -http-address=
- -email-domain=*
- -upstream=http://localhost:7007
- -tls-cert=/etc/tls/private/tls.crt
- -tls-key=/etc/tls/private/tls.key
- -cookie-secret="{{ default (randAlpha 32 | lower | b64enc) .Values.oauthProxy.cookieSecret }}"
- -openshift-service-account={{ include "common.names.fullname" . }}
- -openshift-ca=/var/run/secrets/kubernetes.io/serviceaccount/ca.crt
- -skip-auth-regex=^/metrics
- -skip-provider-button
- -request-logging=true
image: registry.redhat.io/openshift4/ose-oauth-proxy:v4.12
imagePullPolicy: IfNotPresent
ports:
- name: oauth-proxy
containerPort: 8888
protocol: TCP
volumeMounts:
- mountPath: /etc/tls/private
name: backstage-tls

extraVolumeMounts:
- mountPath: /tmp/fakepath
name: backstage-tls

extraVolumes:
- name: backstage-tls
secret:
defaultMode: 420
secretName: backstage-tls

service:
annotations:
service.alpha.openshift.io/serving-cert-secret-name: backstage-tls
ports:
backend: 8888
targetPort: oauth-proxy

serviceAccount:
create: true
annotations:
serviceaccounts.openshift.io/oauth-redirecturi.backstage: 'https://{{ .Values.ingress.host }}/oauth/callback'

ingress:
enabled: true
host: backstage.apps.example.com
annotations:
route.openshift.io/termination: 'reencrypt'

oauthProxy:
cookieSecret: ''

Be sure to update the ingress.host property with the desired exposed hostname for Backstage.

The majority of the values have been reused from prior articles on this subject aside from those that were highlighted in the previous sections as well as the extraContainers property which contains the definition for the oauth-proxy container. Also note that none of the customizations as it pertains to the PostgreSQL database supporting Backstage has been defined either resulting in an ephemeral deployment for demonstration purposes. Consult the prior articles, specifically Exploring the Flexibility of the Backstage Helm Chart, for steps on how to customize the Backstage deploying using the Helm chart along with configuring your machine with the necessary Helm dependencies.

Install the chart by executing the following command:

helm install -n backstage --create-namespace backstage backstage/backstage -f values-backstage-openshift-auth.yaml

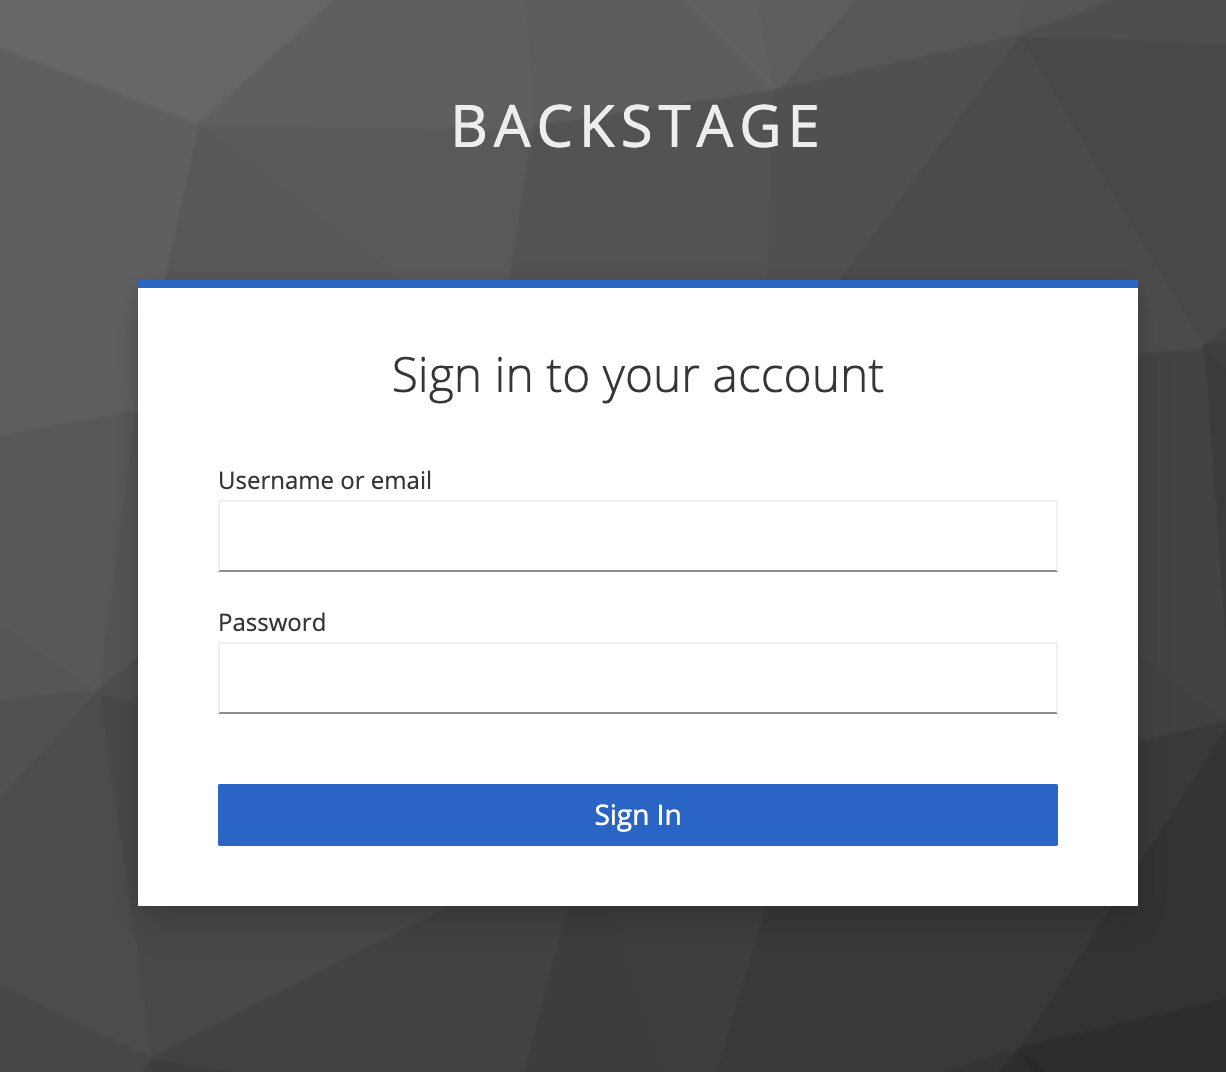
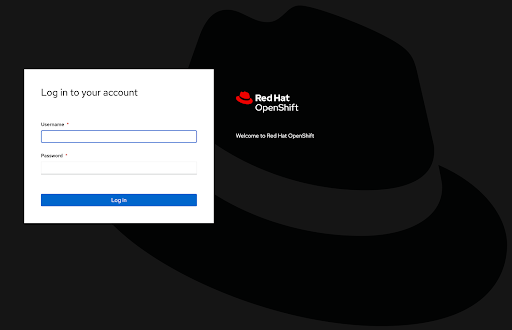
Once the chart has been installed, open a web browser and navigate to the hostname as defined by the hostname within the Ingress resource. You should be presented with the familiar OpenShift login page for which you may be able to select the appropriate identity provider (if multiple are defined) as well as providing your credentials to complete the authentication process.

OpenShift login page

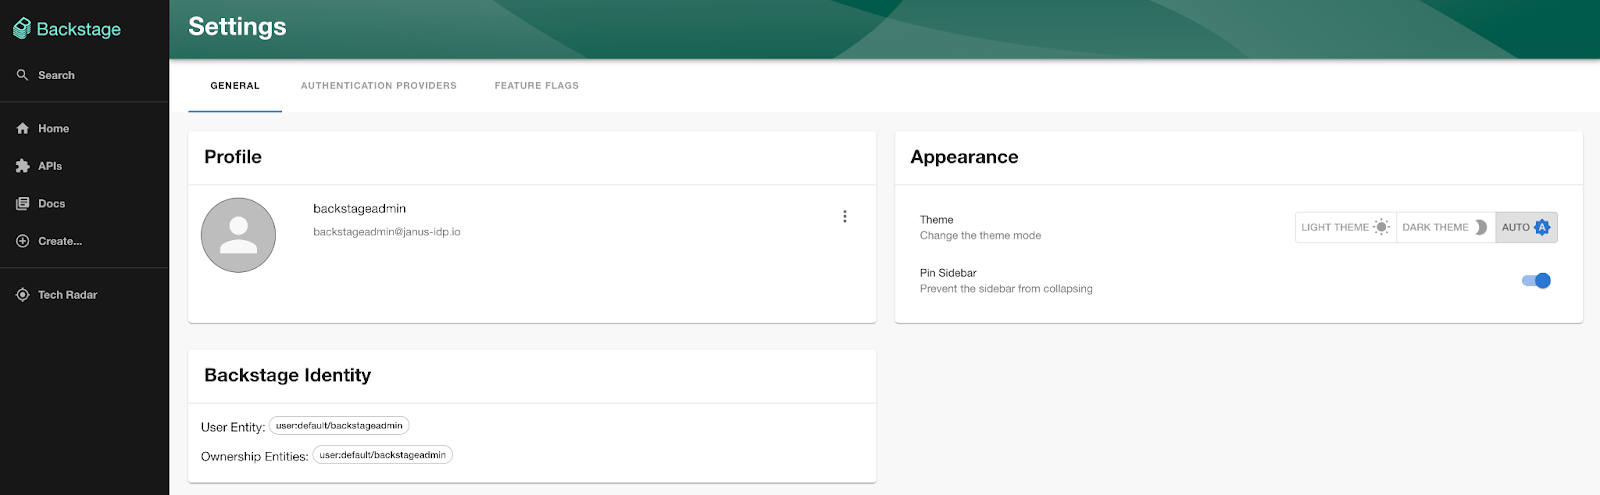
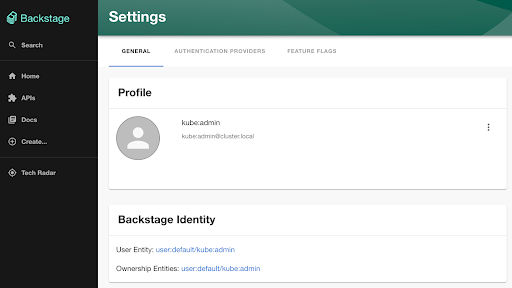
Once authenticated, you will be presented with the Backstage dashboard. Click the Settings button on the bottom left side of the page to view information related to the current authenticated user to confirm the integration with OpenShift was successful.

Backstage Settings - Profile identity

With minimal effort whatsoever and by modifying a few values within the Backstage Helm chart, Backstage was secured. Only those with accounts in OpenShift have the ability to access the portal. When used in conjunction with other integrations, such as the importing of organizational details from external sources, features and capabilities within Backstage can be enabled based on their access level, providing a simplified user experience that enables productivity.

· 12 min read
Andrew Block

The software catalog is the heart of Backstage as it provides a centralized mechanism for organizing all of the assets within a particular domain. This content can include everything from services, websites, pipelines and everything in between and the catalog provides a facility for managing these assets in a declarative fashion along with assigning ownership against them. Identity records within Backstage are represented as Users (individual entities) and Groups (a collection of users) and they enable the association of ownership and policies to resources within the software catalog. The determination of who the user is and their association to a User entity within the software catalog is the core functionality of the authentication system within Backstage. Every installation of Backstage includes a number of built-in authentication providers, and while GitHub is the most common, several alternatives are available to choose from including GitLab, Google and Azure.

Keycloak is an Open Source identity and access management tool and provides capabilities including Single Sign On (SSO), user management and support for fine grained authorization policies. In addition to these features, one of the biggest benefits of Keycloak is that it can federate identities from other external providers including many of the built-in authentication providers within Backstage. By integrating Backstage with Keycloak, a single source of truth as it relates to identity can be attained. The benefits include avoiding the process of having to manage multiple authentication providers along with allowing for a more “cloud native” method of authentication and authorization using the OpenID Connect (OIDC) protocol. Enabling users to authenticate against Keycloak to gain access to Backstage is a straightforward process and will be described throughout the remainder of this article.

Prior to performing any configuration within either Keycloak or Backstage, the first step is to better understand the architecture and the overall process. Unlike other providers, such as those that were introduced previously (GitHub, Google, etc), there is no direct integration between Backstage and Keycloak. Instead, the OAuth2 proxy provider is implemented through the use of the oauth2-proxy to act as an intermediate for offloading the entire authentication process which passes the resulting request for Backstage to process. An overview of the entire flow is described below:

  1. OIDC client is created within Keycloak representing the integration with Backstage and configured within the OAuth2 proxy.
  2. Users attempts to access Backstage and is redirected to Keycloak by the OAuth2 proxy
  3. User authenticates against Keycloak
  4. Upon successful authentication to Keycloak, OAuth process verifies user has met all necessary requirements that are needed to access Backstage
  5. Request to Backstage for the processing of the authentication
  6. Backstage Sign In Resolver ingests request (reading headers provided by the OAuth2 proxy) and either associates the user within an existing entry in the software catalog or a new entry is created
  7. Authentication process is complete and the user can make use of Backstage based on their level of access

As this list illustrates, there are several steps involved to enable Backstage users to authenticate against Keycloak. The first step is to set up Backstage with the necessary configurations to enable the OAuth2 provider.

Backstage Configuration

Similar to the other authentication providers that are included with Backstage, there are steps that must be completed within Backstage itself to support using Keycloak authentication by way of the OAuth 2 Proxy Provider including:

  • Adding the provider to the Backstage frontend
  • Updating the Backstage app-config.yaml configuration file to enable the OAuth2 Proxy Provider
  • Configuring a Sign in Resolver within the Backstage backend

First, update the Backstage frontend by enabling the ProxiedSignInPage by making the following changes in the packages/app/src/App.tsx file:

packages/app/src/App.tsx
import { ProxiedSignInPage } from '@backstage/core-components';

const app = createApp({
// ...
components: {
SignInPage: (props) => <ProxiedSignInPage {...props} provider="oauth2Proxy" />,
},
});

Next, add the oauth2Proxy to the list of authentication providers within the Backstage app-config.yaml configuration file:

app-config.yaml
auth:
providers:
oauth2Proxy: {}

The final required configuration within backstage is to set up an Identity Resolver which will translate the parameters (headers) that are received from the OAuth2 proxy and translate them into an authenticated backstage user. Update the packages/backend/src/plugins/auth.ts file with the following content:

packages/backend/src/plugins/auth.ts
import { DEFAULT_NAMESPACE, stringifyEntityRef } from '@backstage/catalog-model';

export default async function createPlugin(env: PluginEnvironment): Promise<Router> {
return await createRouter({
// ...
providerFactories: {
...defaultAuthProviderFactories,
// ...
oauth2Proxy: providers.oauth2Proxy.create({
signIn: {
async resolver({ result }, ctx) {
const name = result.getHeader('x-forwarded-preferred-username');
if (!name) {
throw new Error('Request did not contain a user');
}

try {
// Attempts to sign in existing user
const signedInUser = await ctx.signInWithCatalogUser({
entityRef: { name },
});

return Promise.resolve(signedInUser);
} catch (e) {
// Create stub user
const userEntityRef = stringifyEntityRef({
kind: 'User',
name: name,
namespace: DEFAULT_NAMESPACE,
});
return ctx.issueToken({
claims: {
sub: userEntityRef,
ent: [userEntityRef],
},
});
}
},
},
}),
},
});
}

The logic included within the identity resolver above is as follows:

  1. Obtain the username that is provided in the x-forwarded-preferred-username by the OAuth2 proxy.
  2. Attempt to locate the user in the Backstage catalog
    1. If found, sign in the user
  3. If a user is not found, create a user on the fly and sign them in

Once each of the actions detailed within this section have been completed, the final step is to produce a build of Backstage. Since the target environment for this demonstration will be a Kubernetes environment, a container image will be the end result of the build process. The steps for producing a container image can be found here.

A reference container image is located at quay.io/ablock/backstage-keycloak:latest if there was a desire to forgo producing a container image.

Configuring Keycloak

Now that Backstage has been configured to support OAuth based authentication, the next step is to set up and configure Keycloak as an identity provider. Keycloak supports being installed in a variety of different ways including as a standalone application or within a container. Consult the documentation for instructions on how to get started and the process involved to install Keycloak. The easiest method, especially when deploying to a Kubernetes environment, is to use the Keycloak Operator. Once Keycloak has been installed and is running, launch a web browser and navigate to the web administration console and login.

After authenticating to Keycloak, either create a new Realm called backstage or select the name of an existing Realm that will be reused.

note

If you choose to leverage a realm with a name other than backstage, be sure to substitute the name appropriately throughout the remainder of the article.

In order to demonstrate users authenticating against Backstage, several users and groups will be created within the Realm. First select Groups on the left hand navigation pane and then enter the names of the two groups that should be created:

  1. Admins
  2. Users

Once the groups have been provisioned, select Users from the left hand navigation pane and create two users with the following details:

PropertyUser 1User 2
Usernamebackstageadminbackstageuser
Emailbackstageadmin@janus-idp.iobackstageuser@janus-idp.io
Email VerifiedCheckedChecked
First NameBackstageBackstage
Last NameAdminUser
GroupsAdminsUsers

Create User

After the accounts have been created, click the Credentials tab and then select Set Password to set an initial password for each account. Feel free to specify a password of your choosing for each user. Uncheck the temporary options so that a password reset is not required upon first login.

Next, an OAuth client needs to be created that will be used by the Backstage OAuth proxy. Select the Clients button on the left hand navigation pane and then click Create Client.

Retain the Client Type as OpenID Connect, enter backstage as the Client ID, and then optionally set a name and description that should be applied to the newly created client and click Next.

On the Capability Config page, ensure the Client authentication checkbox is enabled and click Save to create the client.

Only one configuration needs to be specified on the Settings tab, the Valid redirect URI's. This value represents the endpoint that is exposed by the OAuth2 proxy that will be sitting in front of the Backstage instance, so there is a requirement that the hostname that will be used for Backstage be known.

The OAuth callback url that needs to be configured in the Keycloak Valid Redirect URI's field takes the form <BACKSTAGE_URL>/oauth2/callback. So for example, if Backstage is to be accessed at https://backstage.example.com, the value that should be entered into the field would be https://backstage.example.com/oauth2/callback. Once the value has been entered, click Save.

The next step is to obtain the Client Secret so that it can be used later on as part of the OAuth2-proxy configuration. Navigate to the Credentials page and copy the value present in the Client Secret textbox.

Deploying Backstage using the Backstage Helm Chart

Given that the required prerequisites have been completed and there is a container image of Backstage available and Keycloak has been configured as an Identity Provider, the final step is to deploy Backstage. As previously mentioned, Backstage can be deployed in a variety of ways, but in this case, a deployment to a Kubernetes cluster will be used and the easiest method for deploying Backstage to Kubernetes is to use the Backstage Helm chart as it not only streamlines the deployment process, but provides the capabilities to define the required configurations to enable OAuth authentication with Keycloak. A full writeup on the Backstage Helm chart including the various configurations that it enables can be found here.

The OAuth2 proxy that bridges the integration between Backstage and Keycloak is deployed as a sidecar container alongside Backstage. Sidecar containers can be enabled by specifying the backstage.extraContainer Helm Value. The entire definition of the OAuth proxy container as well as the ability to templatize the required configurations is also supported.

Create a new file called values-backstage-keycloak.yaml with the following content.

values-backstage-keycloak.yaml
backstage:
image:
registry: quay.io
repository: ablock/backstage-keycloak
tag: latest
extraEnvVars:
- name: 'APP_CONFIG_app_baseUrl'
value: 'https://{{ .Values.ingress.host }}'
- name: 'APP_CONFIG_backend_baseUrl'
value: 'https://{{ .Values.ingress.host }}'
- name: 'APP_CONFIG_backend_cors_origin'
value: 'https://{{ .Values.ingress.host }}'

extraContainers:
- name: oauth2-proxy
env:
- name: OAUTH2_PROXY_CLIENT_ID
value: '{{ required "Keycloak Client Secret is Required" .Values.keycloak.clientId }}'
- name: OAUTH2_PROXY_CLIENT_SECRET
value: '{{ required "Keycloak Client Secret is Required" .Values.keycloak.clientSecret }}'
- name: OAUTH2_PROXY_COOKIE_SECRET
value: '{{ default (randAlpha 32 | lower | b64enc) .Values.keycloak.cookieSecret }}'
- name: OAUTH2_PROXY_OIDC_ISSUER_URL
value: '{{ required "Keycloak Issuer URL is Required" .Values.keycloak.issuerUrl }}'
- name: OAUTH2_PROXY_SSL_INSECURE_SKIP_VERIFY
value: 'true'
ports:
- name: oauth2-proxy
containerPort: 4180
protocol: TCP
imagePullPolicy: IfNotPresent
image: 'quay.io/oauth2-proxy/oauth2-proxy:latest'
args:
- '--provider=oidc'
- '--email-domain=*'
- '--upstream=http://localhost:7007'
- '--http-address=0.0.0.0:4180'
- '--skip-provider-button'

service:
ports:
backend: 4180
targetPort: oauth2-proxy

ingress:
enabled: true
host: backstage.example.com

keycloak:
issuerUrl: '<KEYCLOAK_URL>/realms/backstage'
clientId: 'backstage'
clientSecret: ''
cookieSecret: ''
note

The specific configurations provided within this Values file defines a minimum amount of parameters needed to enable the integration between Backstage and Keycloak. It is recommended that the configurations of the OAuth2 proxy be hardened to increase the overall level of security. See the OAuth2 proxy documentation for the full set of supported options available.

Before installing the Helm chart into the Kubernetes cluster, let’s review the contents of the Values file for the significance of certain parameters. The backstage.extraContainers parameter includes the definition of the OAuth2 Proxy and configurations are provided through a combination of container arguments and environment variables.

The location of the Keycloak instance is specified by providing the location of the OpenID Endpoint Configuration. This address can be identified within the Realm Settings page of the backstage Keycloak realm.

Realm Settings

Update the keycloak.issuerURL parameter by providing the value that was obtained from the OpenID Endpoint Configuration. The /.well-known/openid-configuration portion of the URL can be omitted as it is inferred automatically.

Update the keycloak.clientId and keycloak.clientSecret parameters with the values that were obtained from the backstage OAuth client Credentials tab previously.

Next, specify the hostname of the backstage instance by updating the ingress.host parameter.

note

An Ingress Controller must be present within the cluster in order to properly serve requests destined for Backstage from sources originating outside the cluster.

Finally, if there was a desire to make use of a custom Backstage image that was built previously instead of the provided image, update the set of parameters underneath the backstage.image parameter.

Alternatively, instead of updating the contents of the values-backstage-keycloak.yaml Values file, parameters can be provided during the installation of the Helm chart by each parameter using the --set option of the helm install command.

Before the chart can be installed, add the Backstage chart repository as well as the dependant Bitnami repository using the following commands:

helm repo add bitnami https://charts.bitnami.com/bitnami
helm repo add backstage https://backstage.github.io/charts

Install the Backstage Helm chart to the Kubernetes cluster in a new namespace called backstage by executing the following command referencing the customized Values file:

helm install -n backstage --create-namespace backstage backstage/backstage -f values-backstage-keycloak.yaml

Once the Helm release is complete and the backstage container is running, open a web browser and navigate to the location of the Backstage instance.

When navigating to the Backstage, the OAuth2 proxy will intercept the request and redirect the browser to the Keycloak login page.

Keyclock Login

Login with either of the users that were created previously and if successful, the browser will redirect back to the Backstage user interface.

Verify the user details have been passed from Keycloak to Backstage by clicking the Settings button on the left hand navigation pane.

Backstage Settings

Notice how the username and email address associated with the Keycloak user were passed along to Backstage for which policies and relationships can be created to customize their interactions within the portal.

The integration between Keycloak and Backstage enables Backstage to take advantage of the robust identity capabilities that are provided by Keycloak. By enabling users to authenticate against an instance of Keycloak, the same set of credentials can be used to access the Backstage instance and simplifies the adoption of Backstage within organizations big and small.